Blues Harp Draw 2
 I think my harmonica's broken…
When learning to play individual notes for the first time, 2 draw ( 2D ) is often the hardest reed to master. Harp Surgery frequently receives emails asking, is it me or is there something wrong with my harmonica? It may not be what you want to hear, but the short answer is, it's not the harp.
2D is a long old reed, which swings through a big slot when we play. Picture in your mind a spring diving board, fixed at one end and unfettered at the other. The 2D reed and a diving board behave in the same way. Consider also, the fact that 2D shares a chamber with 2B , another long reed in another big slot. These two reeds constantly interact, working as a pair. Consequently, we expend a lot of air when we work in hole 2 and it can feel like we run out of breath really quickly.
Consider also the flexibility of the reeds. With a choice of one natural and two bent positions, 2D is very sensitive to changes in air pressure. When we play 2D for the first time, it can sound mangled or flat. Alternatively it won't respond at all. At the same time we seem to be inflating really quickly.
Fear not, this is a common experience for beginners. Let's investigate things and see if we can help you overcome an important hurdle. It's a relatively short process and we promise you it will be painless. Kim followed our advice and look what happened to her!
So what's going on?
The answer lies in establishing the correct equilibrium of air intake and air pressure to produce the note we require. For the uninitiated, it can be a complex process, involving correct mouth shaping and tongue placement. They need to forge a relationship with the target reed, but currently they're strangers. If you wish to forego reading through this article, here's a possible quick fix. Blow 3B cleanly and accurately, and sustain the note for a whole breath. Consciously maintaining this mouth shape, gently draw 2D . There's every chance this may take you to your goal. To follow our road to enlightenment however, read on.
It helps to understand that lower reeds respond with less effort than higher reeds because there's more to play around with lengthways. There's the diving board image again. Depending on which way you look at it, longer reeds are less resistant to air movement, or more responsive.
Let's go back to school for a moment and consider the time we extended a ruler over the edge of a desk to make kangaroo noises. If the projected end was short, we got a nice pling as we plucked the ruler; but we had to pluck it with force. Insufficient effort produced no sound. When the projected end was longer, we got a nice low brrrrr using the gentlest of finger strokes. If we applied too much force, the ruler would wobble about wildly. The desired kangaroo sound might cut in occasionally, but it most probably wouldn't happen at all. The whole process is random and lacking control.
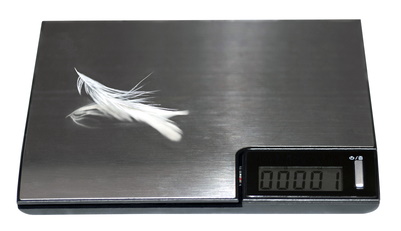
Let's take this one step further. If we applied a heavy force to the end of our ruler and sustained it, the ruler would bend and stay bent. We've applied the weight of a hippo to the end of our diving board. The aim is to swap the hippo for a feather to achieve our balance.
Easy does it
Instead of plucking with our fingers of course, we trigger reed movement through the friction of our breath, ideally supported from our diaphragm. However, if we inadvertently add suction to the process by moving our tongue in a bid to work the reed, we're lurching into bending territory. To put it simply, we're sending our harmonica the wrong signals. We're effectively choking the reed by over-stressing it. The result is a strangled note or no note at all; just the sound of a harmonica player puffing away furiously. What was our aim again? To swap the hippo for a feather and achieve our balance. To do this we need to master breath control and mouth position. Hold that thought.
Abandon any idea of steering or manipulating the draw reed. Manoeuvring your tongue will change the air pressure acting on the reed and just produce more hippos. Moving your tongue tells the reed you want it to bend and it will do its best to deliver. However, bending is a different technique we haven't yet explored. Meanwhile, there's that low quality note again, slurred and off-pitch, or no sound at all. Time out. You're trying too hard.
 And….relax
We'll start work on the solutions in just a moment, but knowing how we found them is quite enlightening. When we opened Harp Surgery's doors to students in the 1990's, we struggled with this recurring issue for months. How was it, when we asked a beginner to sustain 2D , it sounded flat and laboured until just before they ran out of breath? At the last fleeting moment, the reed always returned to its natural pitch, albeit with very thin tone. Why couldn't our student get things going from the start? No amount of inflight embouchure adjustment, patience or cajoling could correct the problem. And yet the natural pitch kept on teasing us at the last moment. The reason remained an enigma.
Then, one wet and windy night, the penny dropped. Everything was happening back to front. The way our students were finishing was the way they needed to start. So what had changed for the natural pitch to kick in? Air pressure. And that's pretty much it. As the student's drew air in and their lungs inflated to the point of bursting, they ran out of pressure and immediately the reed responded the way it should. So all we needed to do was start the way we had been finishing. With this simple discovery, changes started happening.
Your task now is twofold. Firstly you must learn to inhale gently using belly breathing (from your diaphragm), instead of sucking. Secondly you must learn to position your mouth and tongue correctly, then suspend all further movement. We should add that we're applying our solutions with lip-pursing embouchure, rather than tongue-blocking or U-blocking, but the principles are the same. Let's go.

Hot chocolate, soup, eggs and spuds
Imagine sipping froth from a mug of very hot chocolate. Go on, nobody's watching, pretend right now. Where's your tongue positioned as you sip? Now try sipping hot soup from a ladle without burning your tongue. Notice how your tongue adopts the same position. You will need to hold your tongue just the same way when playing 2D , breathing from the diaphragm. Remember we need low pressure and cooling air.
Additionally, imagine you are holding a small potato, or a hard boiled egg in your mouth. Your tongue falls down and back, whereupon the focus should be on inhaling gently through the harp, while pulling from your diaphragm and chest; but keep your tongue still.
Location, location, location
You know you've been wondering why 2D and 3B are the same note? Well keep wondering because the answer is in another lesson. For now just accept there is a perfectly good reason, but ask yourself how come you can get 3B to respond and not 2D . In simple terms it's because 3B has no other place to go. So let's use this to our advantage. Play 3B and close your eyes and sustain a really long, gentle note. As you do so, register where everything is positioned: your lips, your tongue, your throat. This is your position of equilibrium. Essentially you are creating the correct chamber and airflow for the reed's sound waves to resonate. Do this a few more times, holding the position and building muscle memory. This is really important because you're going to adopt exactly the same position when you next play 2D . Incidentally, do not fall into the trap of substituting 3B for 2D . Both notes are there for good reason. There's no avoiding the 2D , or the all important 2D bends that follow. In the meantime let's consider a few more useful tips.
Gently and quietly
Forget about volume, start drawing 2D as gently and as quietly as possible. This literally means a whisper. The reed will stay in pitch and you can establish your position of equilibrium. Close your eyes, repeat the approach and avoid any forceful attack on the reed. Let's take a moment to consider where our control centre is located. Without the harp, push from your diaphragm and whisper as loudly as you can, 'hello Harry, how's you're hippo?'Try again, whispering harder still. Notice how the power is controlled from the back of your throat and supported by the push from your diaphragm. Your tongue and lips are redundant. This is an important concept.
 No gas leaks
If things still aren't happening it doesn't hurt to run a quick system check. Let's review two fundamentals for single note playing, including 2D . The first is an airtight seal (no gas leaks). The second is accuracy (we don't want the neighbours joining in). At the outset beginners can experience a lot of loose air. The tone is thin and notes can be off pitch. If this is what you're experiencing, check out Accuracy and Tone in our Harp Skills menu.
It's imperative to get a good seal around the target hole. Eliminate any peripheral whooshing sounds by adjusting your embouchure. Moisten your lips and get your mouth right round the harp. Your lips should be soft and supportive, but not rigid. Don't be shy and peck your harp politely, it responds to warmth and humidity – start schmoozing! Get your mouth right over the numbers on the cover plate until your upper lip pushes against knuckle of your supporting forefinger. Once you have a clean, airtight response, you'll be better equipped to find the balanced delivery you need and then work on your tone.
With regard to single note playing, if you are still developing your embouchure, this could be adding to your problems in draw 2 . Do your ears tell you that you're playing a single note or multiple notes? Is the sound clean or busy? When you play a draw chord across holes 1 to 4, hole 2 is in the mix, but you need to single it out. Work at this. The embouchure you need is like the first stage of breaking into a grin; find your Mona Lisa smile (for lip pursing at least).
 Use your nose
Remember you are drawing 2D , not sucking in the literal sense. This is no time to suction pump a sticky milkshake. We're gently inhaling through a small chamber to gain a response. Inhale softly across the reed without tugging it and don't move your tongue around. Remember our discovery when playing 2B above.
It will also help to breathe through your nose momentarily as you start. This serves to lower the air pressure still further. As with our whispering technique, the reed is much more likely to remain in pitch. Your nose is a natural pressure release valve. It helps to eliminate the signal to bend. In time you will be able to co-ordinate everything, economising and locating the correct position (the point of equilibrium) right away.

And finally
If you really are wondering why 2D and 3B are the same note, the answers are revealed in two other Harp Surgery posts Why Are Draw 2 and Blow 3 The Same? and Why Are My Harp Notes Set Out This Way? In the meantime you can always try transferring the success you have with 3B across to 2D , but you must ensure you don't change your mouth shape when you do; just alter your breath direction.
Meanwhile be patient. In time 2D will become your best friend – especially when playing cross harp. when you find the natural pitch, work at strengthening the tone without drifting into a bend. Remember, accuracy and tone first, every time. This way you're building a strong foundation and transferable skills with which to develop your playing.
Source: https://www.harpsurgery.com/why-is-draw-2-so-difficult/


Tidak ada komentar:
Posting Komentar